OLPRO Cocoon Breeze review: an inflatable camper van awning
If you have been following our camper van journey you’ll know that we barely got started before lockdown happened. So we were itching to get out with our VW T5 when restrictions eased in July, not least so we could try out our new inflatable camper van awning, the OLPRO Cocoon Breeze.
*This post contains affiliate links. If you click and buy something, I may earn some commission. This is at no extra cost to you but helps me cover the costs of running this website. See my privacy policy and disclosure policy for more information.*
We are OLPRO brand ambassadors and have been given the Cocoon Breeze to try out.
There’s also a discount code at the bottom of this post, which you can use on any OLPRO purchases. You’re welcome!
This post includes our first impressions having tried it out on our trip to Haven Perran Sands Holiday Park in Cornwall and longer term observations over a further four camping trips during the summer of 2020.
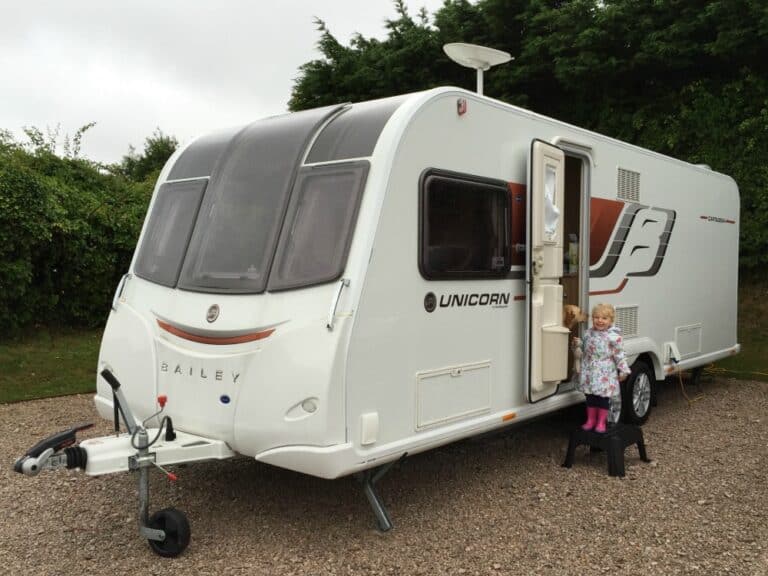
As long term followers of Tin Box Traveller will know we downsized from a large caravan to a day van.
While there are many pros and cons for caravans vs camper vans one of our worries, and an unavoidable compromise, is the living space available in a camper van.
When we made the move from caravan to camper van we always knew we were going to need an awning. This would give us space to spread out and store our camping gear when on site. We also wanted to keep the freedom of the camper van.
So having a driveaway awning that was quick and easy to put up was essential.
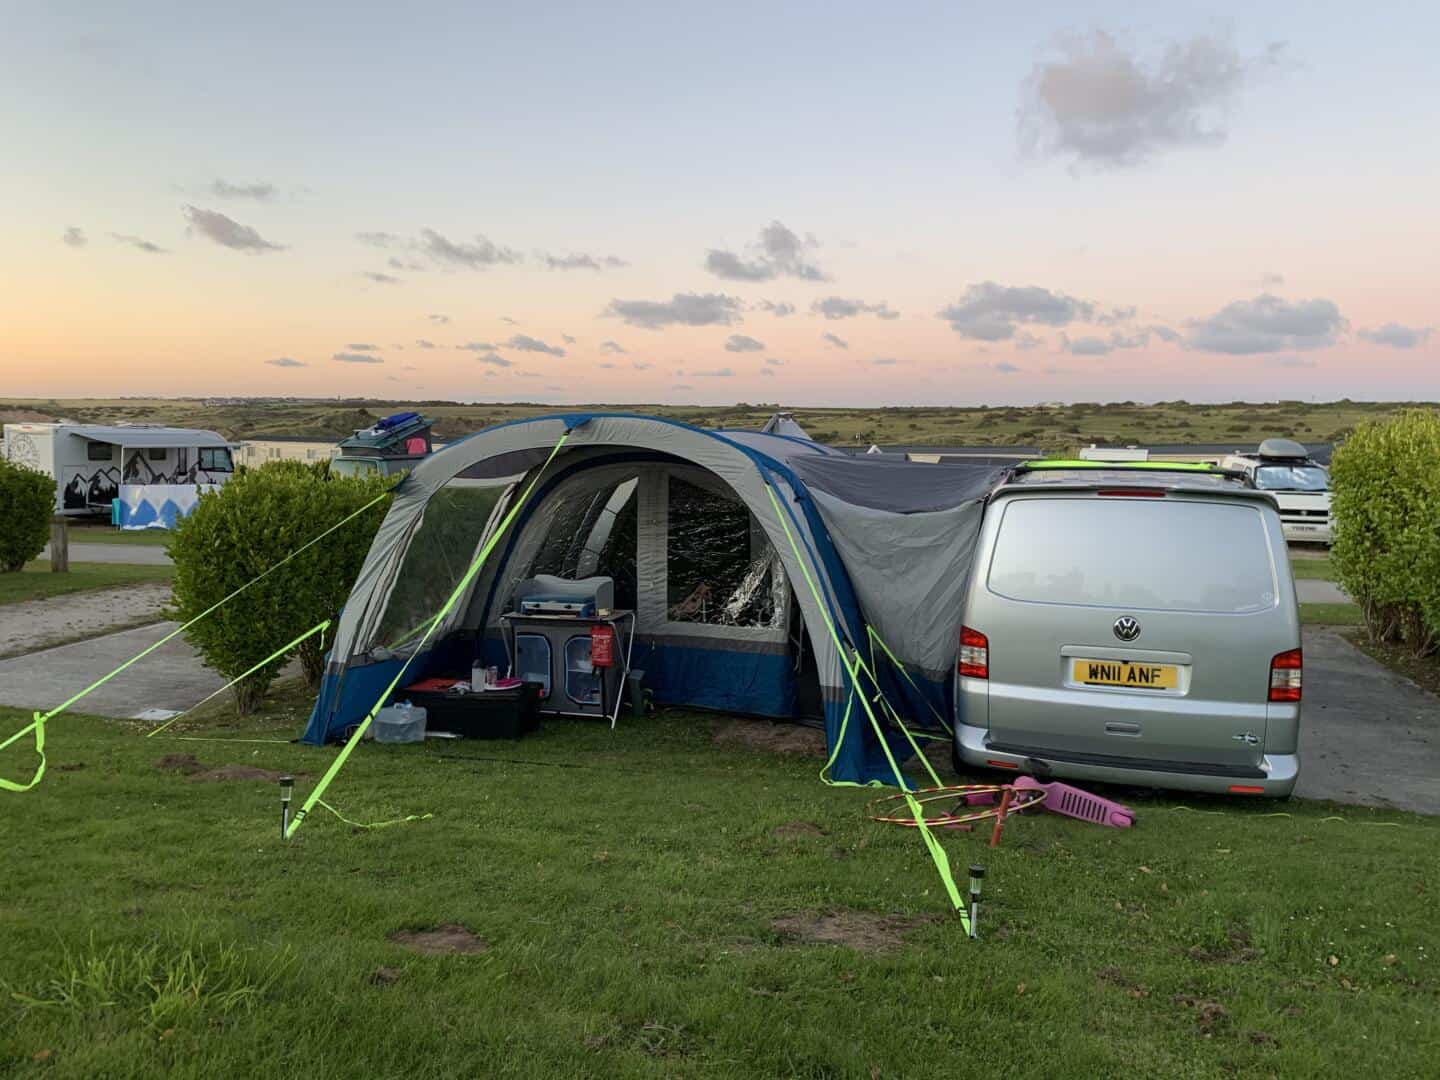
The Cocoon Breeze seemed the perfect solution and we have not been disappointed by the space it’s provided to store our belongings and give us somewhere to live while on site.
Want more ideas for family holidays and days out? Read my tips for smashing family travel and sign up for my newsletter.
Here’s what you need to know about this inflatable awning for camper vans:
Contents - jump to what you'd like to know
OLPRO Cocoon Breeze features
This inflatable awning will fit camper vans between 190cm and 250cm high.
- Height: 210cm (82.7”)
- Length: 455cm (179.1”)
- Width: 350cm (137.8”)
- Packed dimensions: 82cm x 43cm x 43cm (32.3” x 16.9” x 16.9”)
- Weight: 30kg
- Hydrostatic Head: 5,000mm H/H
- Material: 150D Oxford
- Sewn in groundsheet: Yes
- Pitching time: 15 minutes (OLPRO’s estimated time)
Here’s some more drive away camper van awnings in the OLPRO range.
How to put up the OLPRO Cocoon Breeze
Mr Tin Box is no stranger to putting up tents and awnings but this was our first experience of an inflatable system.
OLPRO quote 15 minutes to pitch and with a bit of practice this is definitely achievable.
Here’s an overview video of what happened when we put the awning up on site:
Here’s the step by step process:
Spread the awning out in the desired location, peg down one side and inflate.
The poles take just a few pumps to make them rock solid. A hand pump is included with this camper van awning. There are three shorter storm bars to inflate as well.
After that it’s just a case of pegging down and hooking in the bedroom inner tent.
As novices to driveaway awnings our biggest problem was working out how far away the day van needed to be parked in order to connect the canopy.

How to get the tunnel right on the Cocoon Breeze
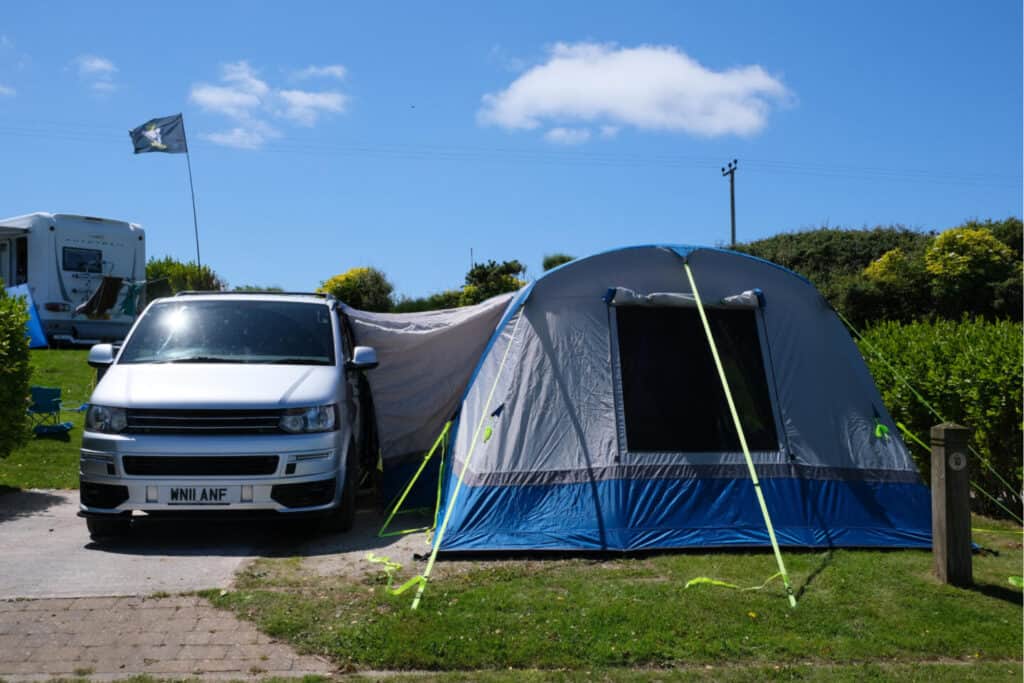
A top tip from OLPRO is to first slide the awning into the camper rail and then peg the bottom of the tunnel just under the van. Pull the canvas tight and then peg out the corners.
Make sure the doors are closed and then inflate the poles.
Before you drive away from the awning put a peg or chock by the back wheel so you have a marker to guide you in when you get back. This also helps indicate to other campers that you will be parking in that spot so they don’t pitch too close.
We tried this method the second time we took the awning out and it worked really well.
We’ve since been able to perfect this set up. So our advice to anyone using this awning is: don’t expect to get it right first time but with practice you will get there.
How strong is this camper van awning?
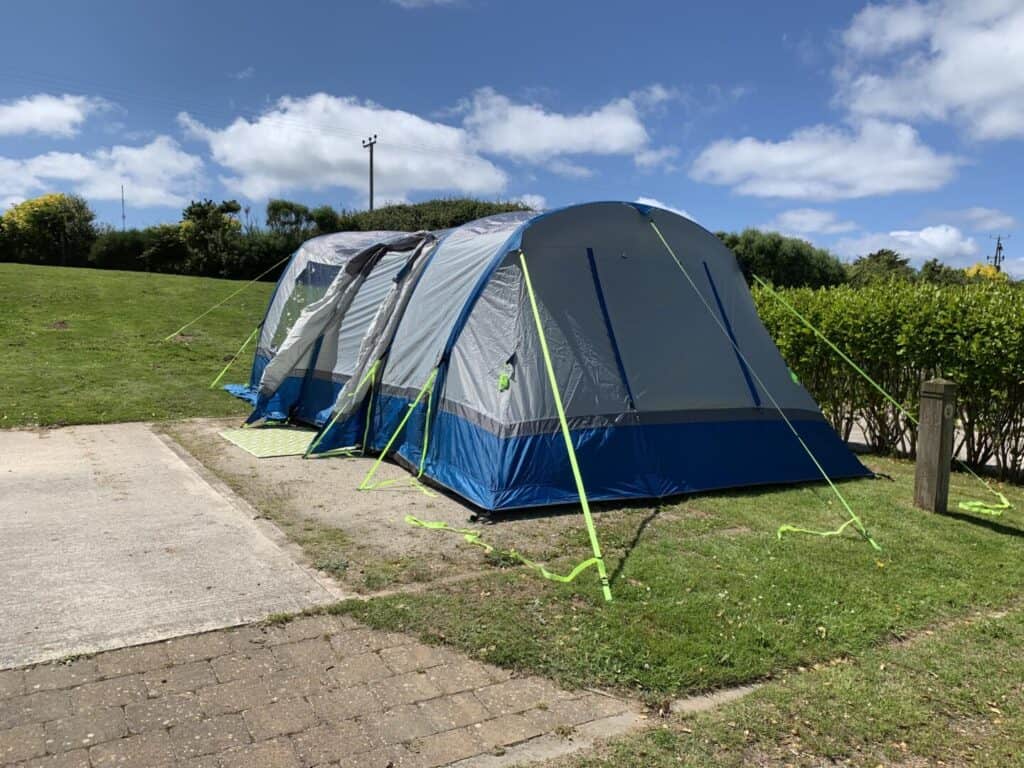
Having been used to carbon fibre and steel poles we were a little worried about how sturdy an air awning would be when we pitched for the first time. We need not have worried.
Even with the stiff onshore breeze blowing when we arrived, once the poles are inflated they are incredibly strong.
The storm beams add even more rigidity to the structure. And the included storm lashings give real confidence that once pitched the awning won’t be going anywhere.


How does this awning handle extreme weather?
Bad weather seems to have become the norm when you are holidaying in the UK in August. We’ve camped in storms the past two summers. This includes two storms and several days of heavy rain while using our OLPRO awning.
The awning has 150D Oxford fabric which gives it a quality feel. And the 5000mm hydrostatic head and sewn in groundsheet are designed to withstand the worst of the English weather.
So, how did it fare during the storms in August 2020?
We were really impressed. While we were camping at Little Winnick Touring Park in At Austell, the awning stood up the tail end of Storm Ellen and the full force of Storm Francis in August 2020. The sewn in ground sheet was brilliant. Our pitch was waterlogged on the last day of our holiday in Cornwall but we and our belongings were kept dry.
The kids however…

Some rain did come in the seams along the air beams and puddle at the bottom but we have since used Fabsil to re-waterproof these areas. We hope that this won’t be a problem next time we are out.
In general, you can expect a bit of condensation on the inside of the awning in the mornings – after all, this is a polyester awning rather than a breathable canvas one. But it’s not the rain getting in.
We also have the Cocoon Breeze extension and have found this to be less waterproof. It also doesn’t have a sewn in ground sheet. It’s worth bearing this in mind in bad weather and reorganising your gear if you are worried about the prospect of it getting wet.
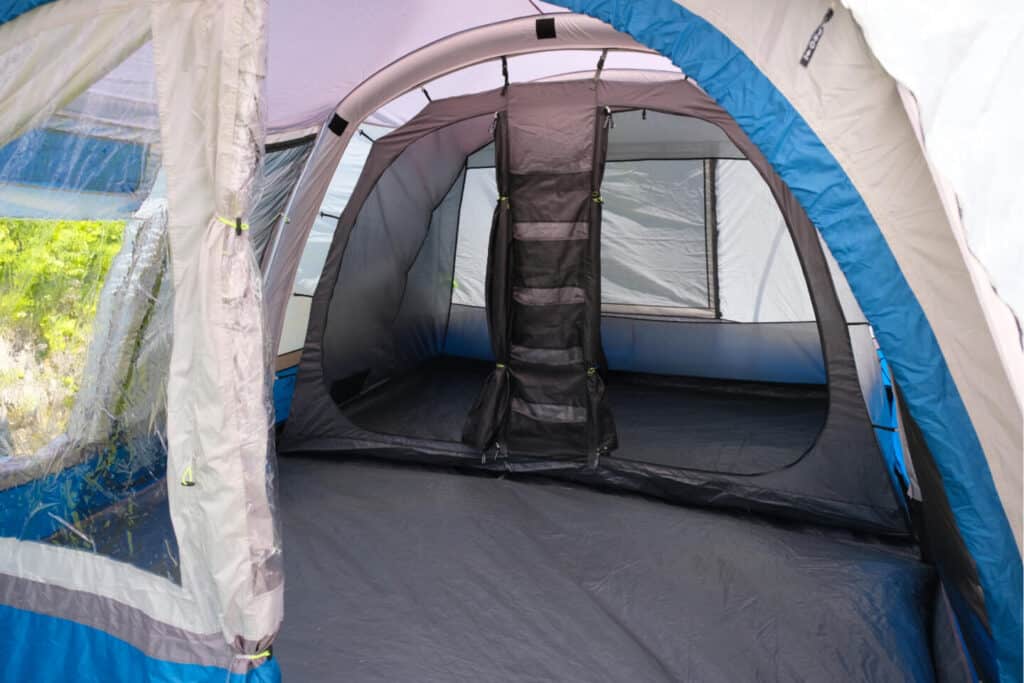
How we use the OLPRO Cocoon Breeze
The Cocoon Breeze camper van awning is highly versatile and you can use it in a variety of ways.
We sleep in our day van so the awning is primarily a living space.
Read more about how we sleep a family of four in our VW Transporter beds.
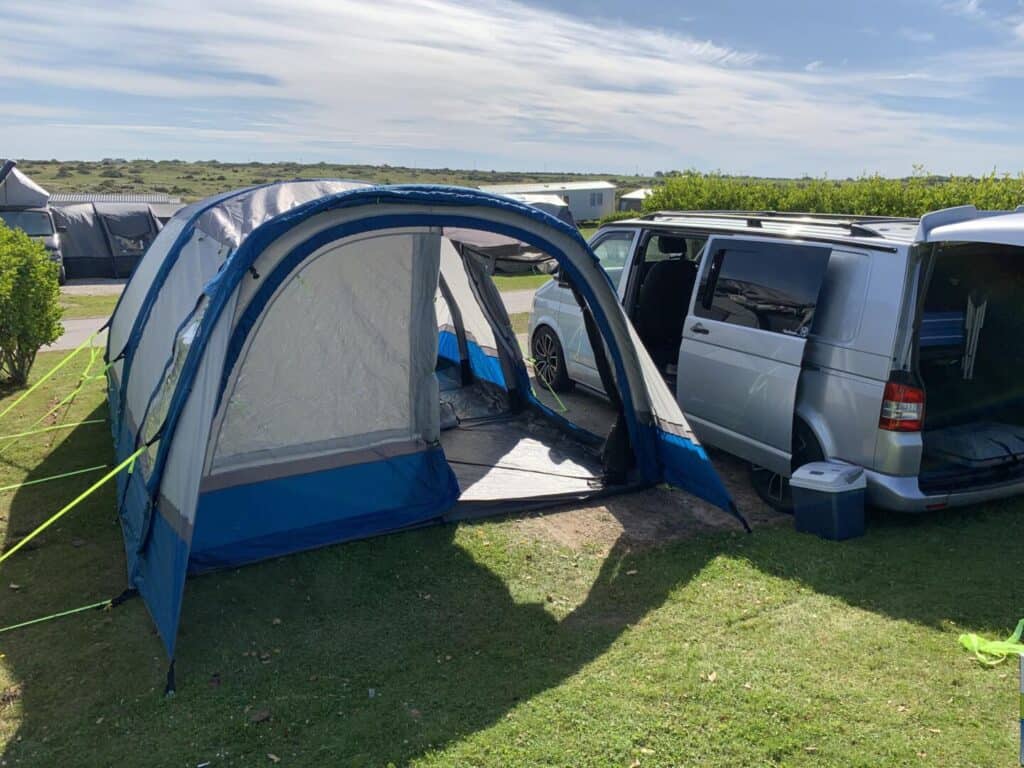
We use one of the ‘bedroom’ spaces as a changing room and store. It’s great to be able to contain all our paraphernalia into one space, and zip the door closed on it to hide the mess!

The smaller bedroom houses our porta potty. We use this at night to avoid having to dash to the toilet block.
The large central space is where the camping table and chairs live.
All the cooking is done under the shelter of the awning extension (you can buy this separately) making sure the tent is not filled with cooking smells and smoke.

What do we like about this inflatable camper van awning?
The awning feels like it has been designed by people who might actually use it. There are lots of nice design touches that make life that little bit easier to live with:
- There is a zipped electric cable entry point for the all important electric hook up.
- The front door zips down flat so you don’t trip up going in and out.
- There is a hook for hanging a lantern or light, which includes hook and loop cable tidies so you can neatly run a cable up to the roof.
- The bedroom annex includes an inbuilt tidy on the front, which is perfect for stowing away kids shoes and other small items.


The only improvement we would really like to see is black out fabric on the bedroom annex. We have found this really handy in family tents we have owned.
You might also like to read my review of the OLPRO Wichenford Breeze air tent.
Extras for your camper van awning
Here’s some camping accessories you might like to add to your set up:
OLPRO Cocoon Breeze Awning Extension
The OLPRO Cocoon Breeze is quite a large awning to start with. But if it’s not quite big enough you can get the Cocoon Breeze Campervan Awning Extension. This adds another 180cm to the length of this camper van awning.

You can either move the front door to the end to increase the interior space or have it as an open air shelter at the front of the awning.
We did the latter and found it an ideal area to cook and to sit sheltered from the wind. Simply zip it to the front of the awning and inflate the single pole.
Awning driveway kit
Another useful addition is the Awning Drive Away Kit. This clever strip of fabric and plastic makes removing and reattaching the awning really simple. You can just slide the plastic figure of eight off the beading fabric without having to mess around with the awning canopy.
Hard ground pegs
Years of experience have made it clear to us that the tent pegs supplied often don’t cut it in the real world.
We have a bag of rock pegs or hard ground camping pegs which we always use on tents and awnings.
When combined with a small lump hammer you can pitch on almost any surface.
We also recommend having a cheap pair of mole grips on hand to help when pulling the pegs out.
Take a look at our full camper van packing list.
Ground sheets and tent carpets
If you really want to look after your awning you can invest in a footprint ground sheet to protect it from mud and damage.
For an extra touch of comfort you can also purchase a fitted carpet.
OLPRO discount code

As an OLPRO ambassador I can offer you 10% off OLPRO products if you use ‘TinBox10’ at the checkout on their website.
This is redeemable on full price products and those that are already discounted.
Happy shopping!
Our OLPRO Cocoon Breeze review
We are big fans of the OLPRO Cocoon Breeze. The size and layout suits us perfectly and we were really impressed with the quality and design. The fact we’ve now seen it can stand up to extreme weather gives us confidence to keep on using it into the autumn camping season.
The simplicity of pitching means it’s no chore to put up. Mr Tin Box is still working on getting his pitching time down to 15 minutes but is getting closer all the time.
With a RRP of £895 this inflatable camper van awning is not cheap but OLPRO run regular promotions and sales.
You might also like to read my review of the OLPRO Wichenford tent.
Do you have an inflatable camper van awning? Do you have any top tips or tricks you use? Let me know in the comments below or on my social media channels.
Disclosure: we were spent this inflatable awning for the purposes of reviewing it for OLPRO. All opinions share are my own.
Read more product reviews
We’ve shared our honest thoughts on loads of camping, outdoor and family travel products here on the blog.
Want to know what we rate? Read our product reviews.
Looking for a new driveway awning for your camper van? Why not save this OLPRO Cocoon Breeze review on Pinterest.


Tin Box Traveller – So glad I did a review search on the Cocoon Breeze Campervan Awning and found your page 🙂
Not only is it a fabulous and informative review and totally confirmed our preferred choice of drive away awning, but by using your Reader Discount ‘TINBOX10’ we have also save an extra £80 off the Awning and Extension package and additional door, which was already on Special Offer for March 2021 delivery !!! Roll on end of UK Lockdown so we can get out and “Bongo-ing ”
Happy Travels 🙂
Hi Carole, I’m so glad you found it helpful and were able to get a bargain! Indeed – we can’t wait to get out and about again. Enjoy when that day comes!! Claire
This looks a pretty good awning for your purpose. I would suggest that during inclement weather or strong wind that it would be good practice to move the wall to the end of the extension. This would keep the kitchen area dry and avoid having a potential wind sock if the wind was prevailing from that end of the awning.
Yes, good tip. It’s versatile enough to do this.
Useful video thanks. Have you any tips for keeping the drive away awning high enough to be able to open and close the side door on the van without it catching.
They come with the most basic instructions and don’t tell you what all the parts and poles are for.
Nothing in respect of that. Same when you come to drive away no advice about how to leave it.
Jonathan recently posted…When is the best time to book a holiday for 2021?
It’s definitely one of the trickier elements of using drive away awnings and we dont always get it right! Here’s some tips
1. Use a drive away awning kit
2. Have awning secured to the awning rail and the tunnel pegged out before inflation.
3. Position the tunnel as close to the front of the sliding door as possible 4. Use spare pegs and guy lines to mark out a parking space so you can drive back into the right position when you return to the awning.
5. Use the straps that go over the van as well as the awning rail if it is due to rain.
The poles are for the side door (opposite the drive away door) to set it up as a porch. Closing the side door without it catching comes down to where you park the van – small changes to its position make a big difference. We are going to use a pole and clamps in our multi-rail to secure the tunnel next season as heard good reports about this method.